As discussed in the What to Bring to the Range Article, every range trip should have a purpose and a goal. This will ensure that you stay on track with the gear you bring, accomplish a task to improve your situation, and possibly save money as you aren’t endlessly mag-dumping into a berm with less-than-ideal results. This article on Zeroing Your Rifle will outline our process of getting zeroed at the range and the minimal pre-flight work you can do to improve your efficiency.
Table of Contents
What’d I Get Myself Into?

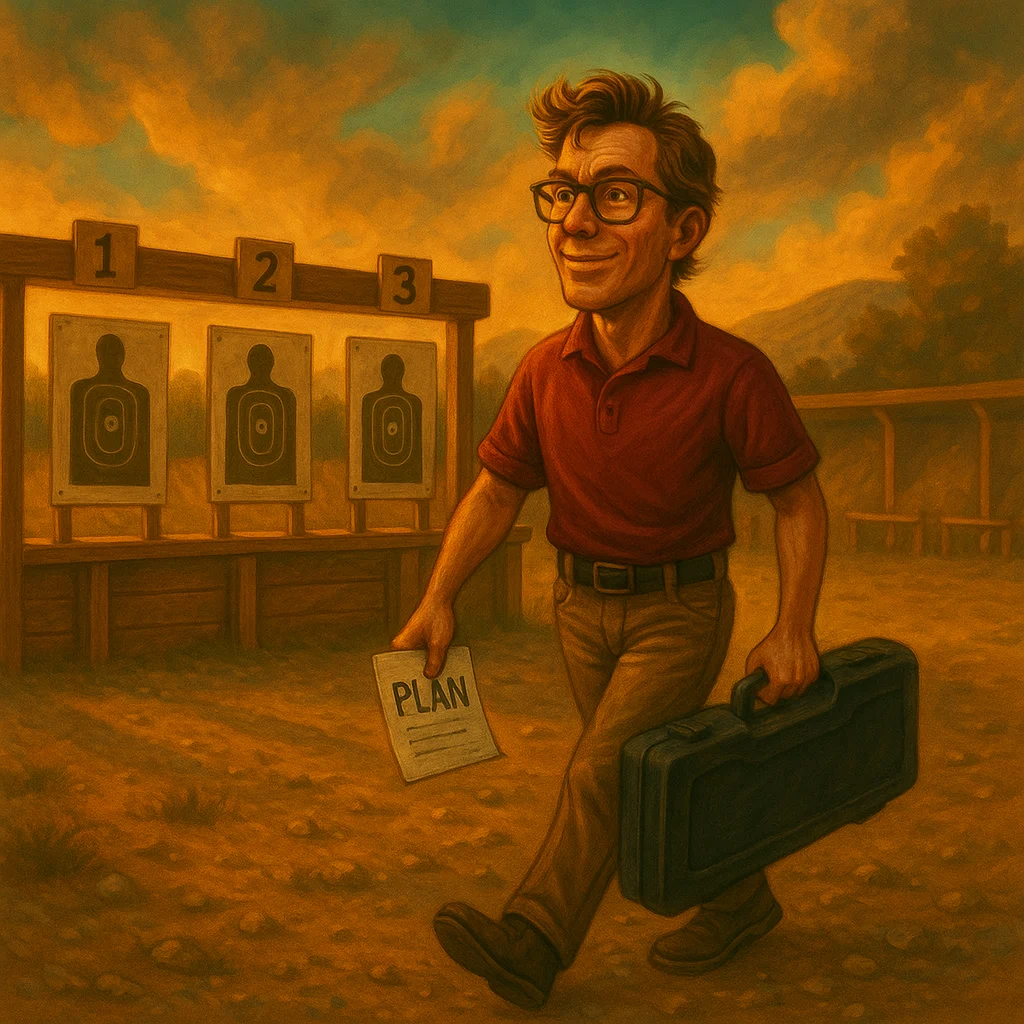
You’re rounding the bend to the new range you’ve only just discovered on Google Maps, hands sweaty, gripping the wheel. You have a new freedom dispenser in the back. You’ve read our article about what to bring. You made a list, and you checked it twice. Still, as you pass the rows and rows of Ford Heavy Duties and GMC 2500 Professional Grade trucks littered with Punisher, Back the Blue, and Volunteer Firefighter stickers, you have this image of opening the door to your Saab as all the necessary accoutrements you’ve packed it with come pouring out onto the ground. Throngs of men wearing Crye pants, tattooed sleeves, and GOVX Sunglasses surround you and shame you back out of the parking lot from whence you came. Shame, Shame, Shame.
The chances of this happening are very low, but never zero. So, to prevent such mental scarring and emotional baggage, we will prepare you with a game plan. Zeroing your rifle shouldn’t be stressful, we’ll get you squared away to make the most of your trip.
The Pre-Game
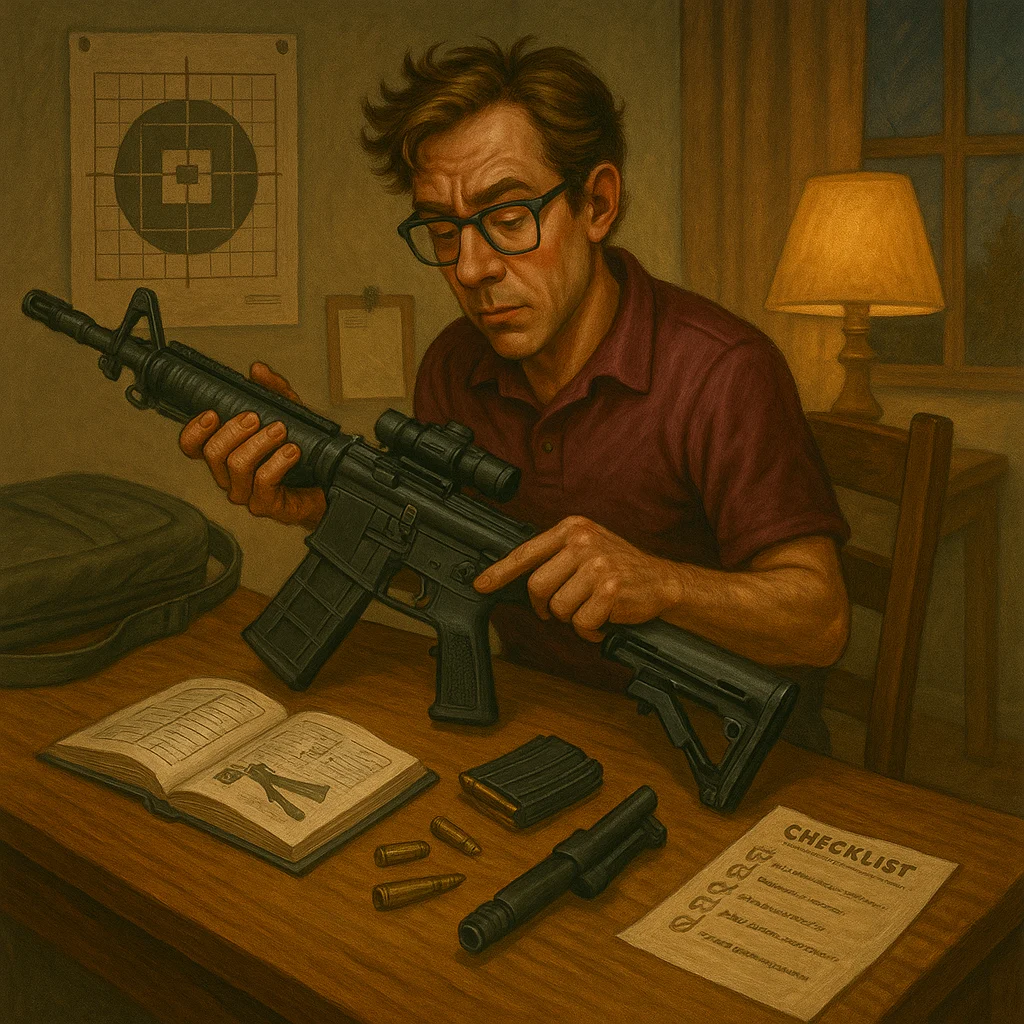
Long before you even get to the range, there are things that you should do at home to ensure you are ready to go when you arrive. You should be fairly familiar with the operation and functions of your rifle, such as how to seat a magazine, chamber a round, operate the safety, and make any fitting adjustments. Reading the manual, while seemingly frowned upon these days, should also be something you do. Let’s talk about what you can do before even loading the car to get prepped for your zeroing session.
Fitting Your Rifle
Ensuring that your rifle fits you is a great way to become familiar and confident enough with your gun that all you have to do at the range is concentrate on the fundamentals of shooting and establishing your Natural Point of Aim, collect data, and make final adjustments. The steps below are often overlooked and when they aren’t executed with precision will compound to add variables and issues that will need to be overcome when at the range. With your recent investment, it is vital that you are setting up you and your system for success instead of becoming frustrated and blaming the equipment for less then stellar results.
Mounting the Rifle
While in the comfort of your own home, the efficiency of future range visits will improve by spending time mounting the rifle in as many positions as you intend to shoot, building familiarity. Practice getting the rifle in the correct position to be comfortable before you visit the range. Besides comfort, establishing and being familiar with positions will also help you set up the eye relief on your scope correctly and adjust the height of your head when getting the cheek weld on your stock. You can do this by either using a stock with an adjustable stock comb or foam padding and 100 mph tape. The prone position is the most stable way to get behind the rifle.
Prone
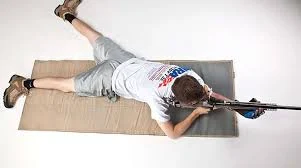
This image illustrates an improper prone position where the rifle’s bore axis is not aligned with the shooter’s spine. When the barrel isn’t in line with the body, the rifle’s rearward force is absorbed unevenly, causing deflection. Instead of distributing recoil through the full stabilizing mass of the body, it’s directed into a misaligned structure, reducing control and consistency.
Unless a shooter is consciously correcting their position, the rifle will naturally follow the path of least resistance. If that path isn’t perpendicular to the direction of recoil, the rifle will deflect accordingly, often unpredictably.
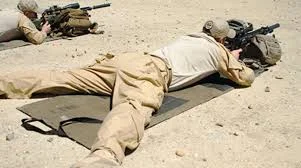
This shooter can be seen with his spine aligned with the direction of the barrel. All the rearward force of the shot will come straight back into the body, negating as much deflection of the barrel from the target line as possible and, therefore, narrowing the dispersion of your round impacts down range. When you are shooting, and your Natural Point of Aim is correct, the rifle should return to the target.
While at home, you can practice on a mat, getting into position. Mount the rifle with your eyes closed until it feels comfortable with the cheek rest and length of pull, then open your eyes. The scope and head position should be perfect. If it is not, make adjustments accordingly.
Note that many ranges do not allow for prone position shooting. Be sure to check with your range before driving out there only to have your dreams and aspirations vanquished.
Seated Shooting Position
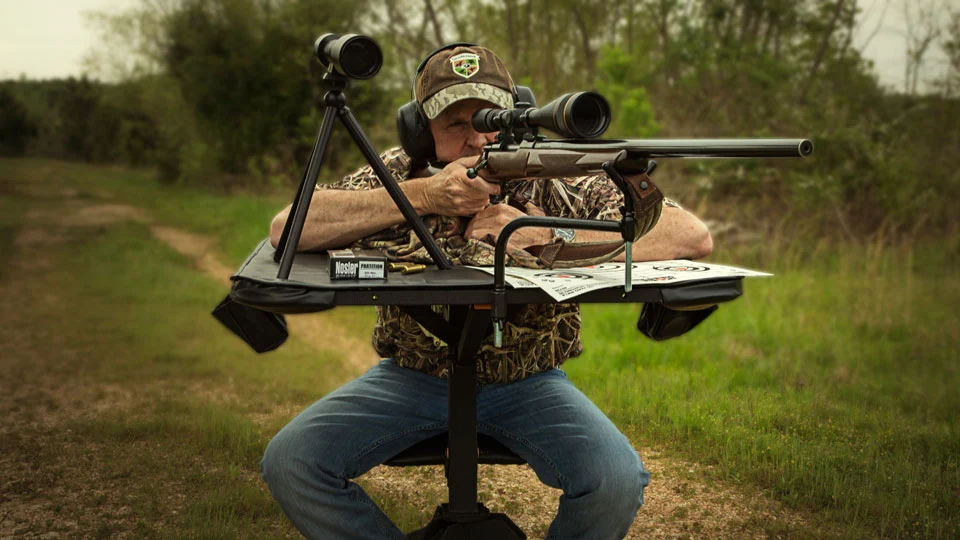
The Seated Position can maintain the correct orientation of the rifle axis to the spine. Both elbows must be evenly supported. The image above shows a great seated position. Often, you will find shooting benches that will not allow both elbows to be properly supported.
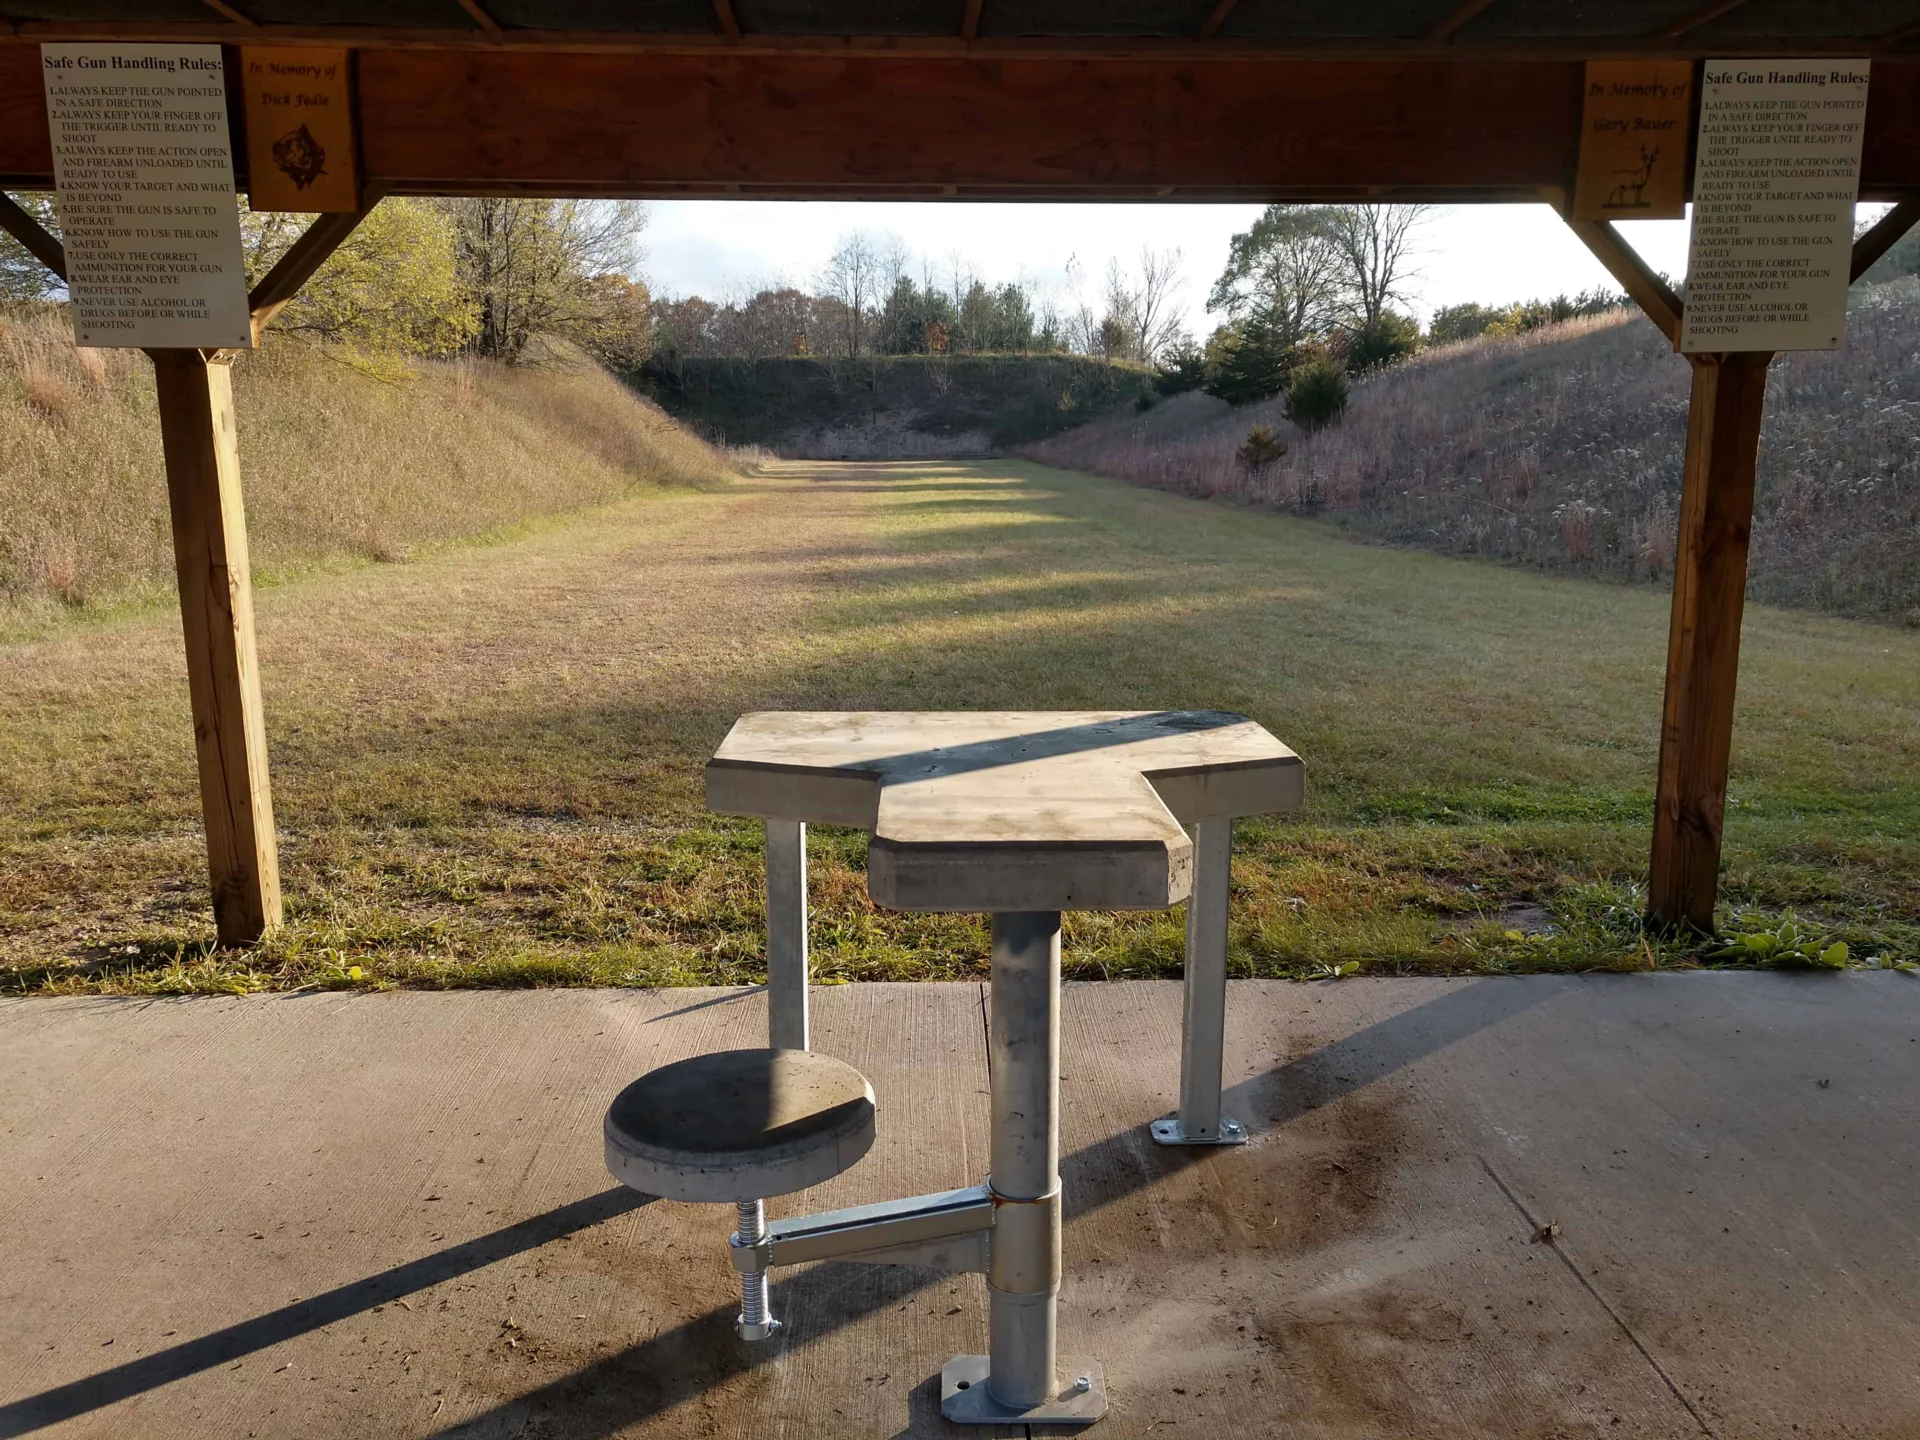
This type of bench is popular in many ranges across America and only contributes to poor shooting positioning. It naturally encourages a canted approach to mounting the rifle and should be avoided or worked with to mitigate the positioning it forces you into.
In either case, changing from a prone position to a seated position can affect the head positioning enough for it to be noticed, particularly when using an optic.
For this reason, we recommend moving between these positions prior to finalizing your optic placement or even mounting it on the rifle just yet. Shooting is a layered approach activity, mounting your rifle is one of the earlier layers followed by added layers, such as your optics.
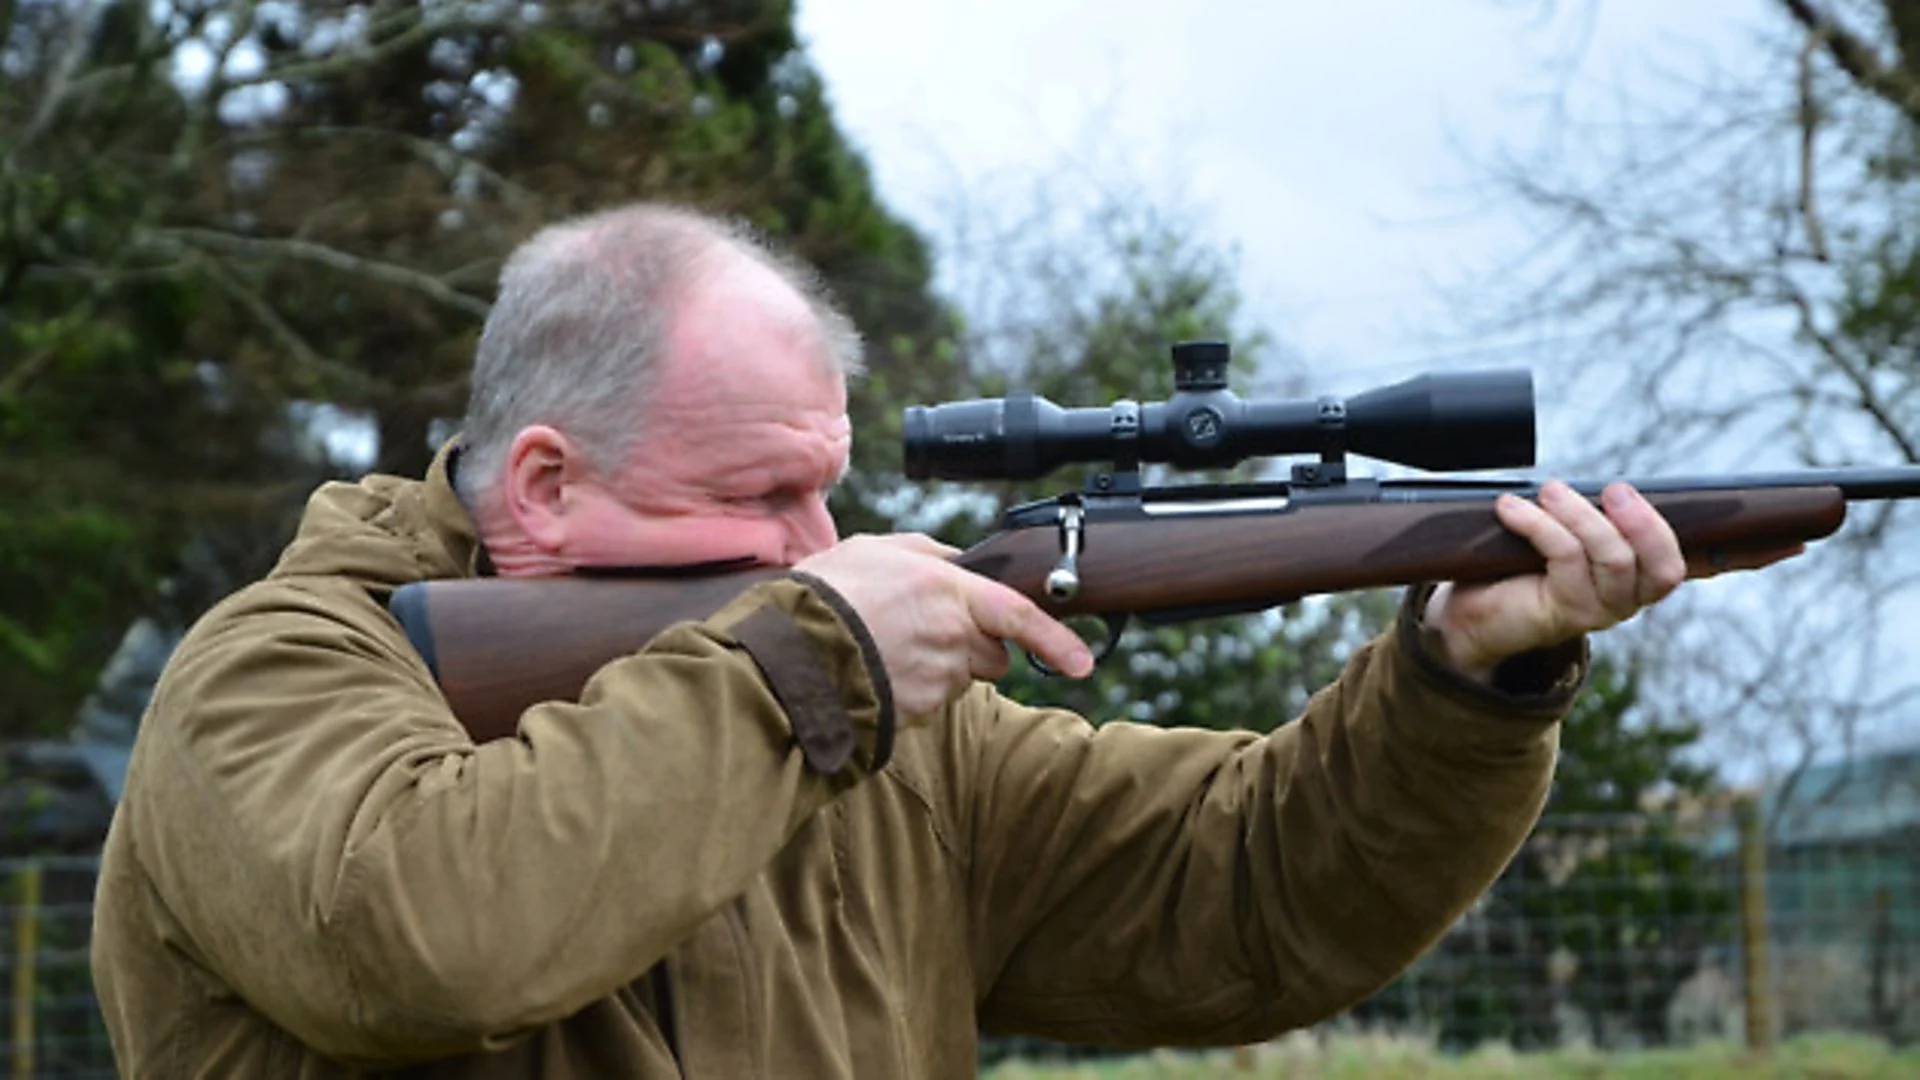
Standing
The shooter in the image below is maintaining proper spine-to-barrel alignment. The rifle is positioned under his dominant eye. Weight is evenly balanced on both feet and elbows. The hips are in proper alignment, allowing the body’s weight to contribute to minimizing the rearward force of the rifle. This is a great position when having to utilize a standing position. Often, this position is done when benches don’t allow for you to sit properly behind the rifle.

Mounting the Scope
Often, people will mount the scope and then get their body in position to see through it, which will inevitably create poor posture, craning of the neck, and poor fundamentals when mounting the rifle. This is putting the cart before the horse. Now that you’ve comfortably learned to mount your rifle, it is time to get the scope in the proper position.
Scope Height
Proper cheek height alignment to your scope is critical for consistent accuracy and repeatable shooting mechanics. When your cheek naturally rests at the correct height on the stock—often referred to as a proper “cheek weld”—your eye is instantly aligned with the center of the optic, allowing for a full, clear sight picture without shadowing or strain. Inconsistent or improper cheek weld can cause parallax error, reduce field of view, and slow target acquisition, especially under pressure. Using adjustable combs or cheek risers ensures your eye sits at the same position shot after shot, building muscle memory and improving both precision and confidence behind the rifle.
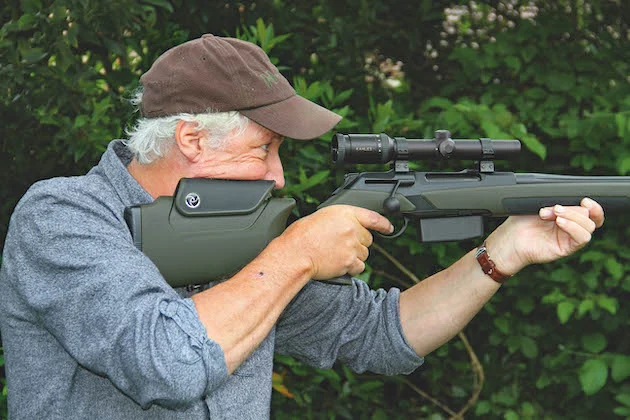
You can see here that the stock does not allow for the proper alignment to the scope, with his eyes being far too low. There are many options to use to raise your head, from adjustable aftermarket stocks, padding, or even foam padding and tape.
Here you can see a proper alignment to the scope and the eye. This will allow for more efficient sight picture acquisition.
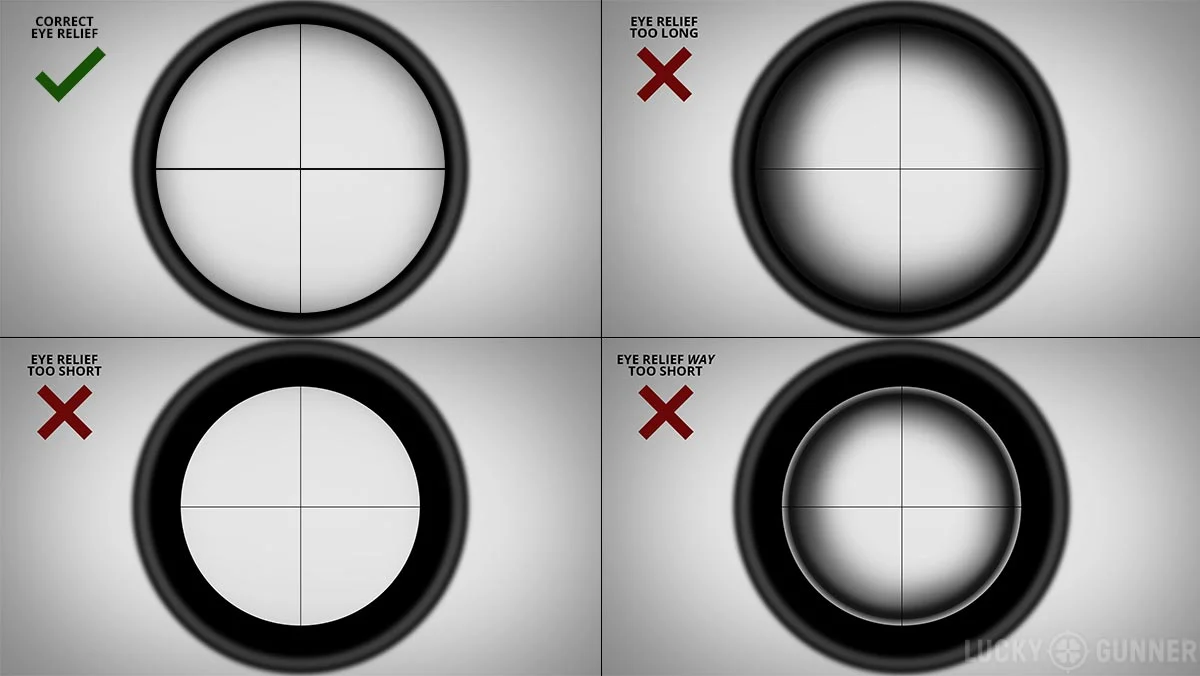
Eye Relief
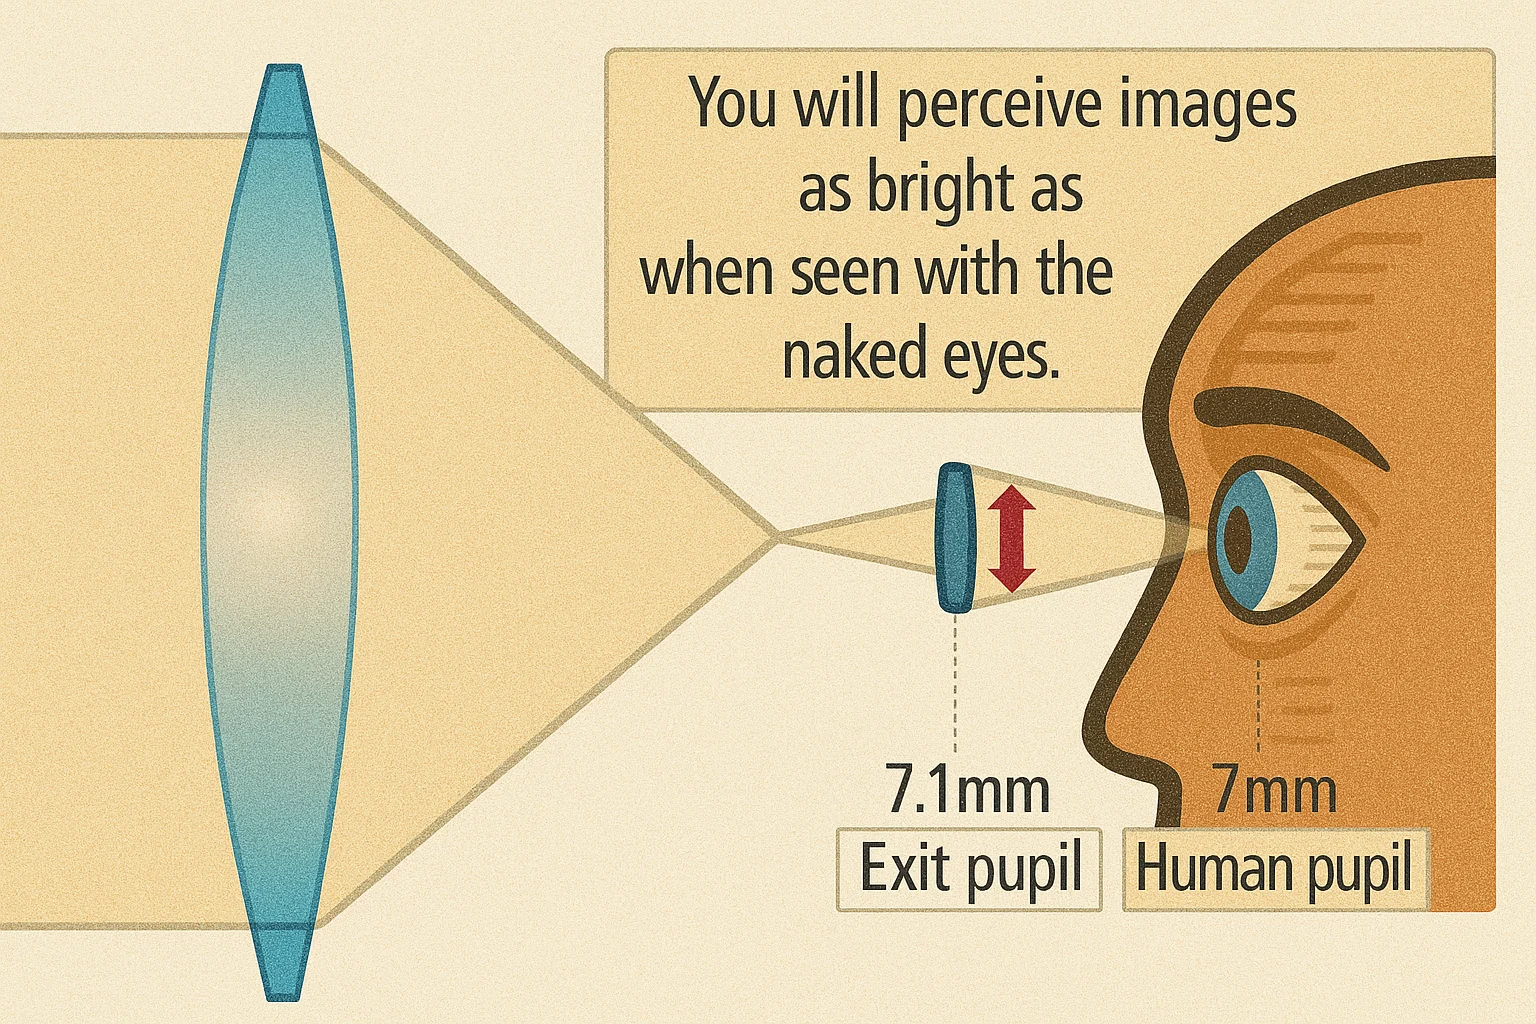
Your eye will not be right up against the optic, this would be bad. While binoculars perform this way, the rifle scope is designed to have space where you can see a crisp image, from edge to edge, while having your face some distance away from the Exit Pupil.
While the scope is mounted to your rifle and you have established a comfortable cheek weld with proper height alignment, adjust the scope forward or backward until the image appears crisp and clear from edge to edge—this is your optimal eye relief. Begin this process at low magnification and then confirm it at higher magnification, as image clarity and eye box sensitivity can change. Once you’ve found the sweet spot, mark the scope tube in relation to the rings using a sharpie or a small piece of tape. This reference mark will help you preserve the correct eye relief during final installation, allowing you to make a final adjustment for reticle cant before fully tightening the scope rings.
Adjusting Scope for Cant
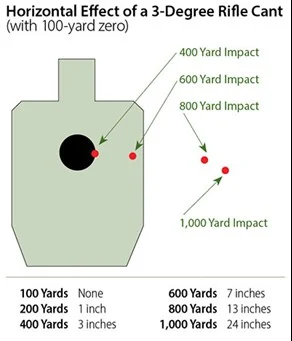
Reticle cant is a lesser-known but important factor in precision shooting. Most riflescopes are assembled by hand, which introduces a small but measurable margin of error. Even top manufacturers like Leupold and Nightforce allow for slight misalignment—up to 3 degrees for standard Leupold scopes and only 0.5 degrees for Nightforce optics. While this doesn’t significantly affect shots under 300 yards, it becomes increasingly problematic when using the reticle for long-range windage or elevation corrections. A canted reticle introduces lateral error into your aim, even if the scope itself is mounted level.
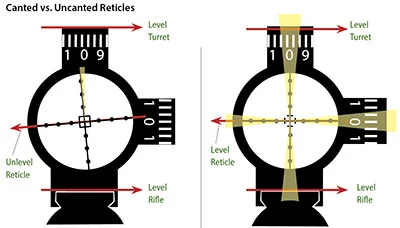
Although you can’t eliminate reticle cant internally, you can work around it by aligning the reticle with a plumb bob while the scope is fixed in a level mount. Adjust the scope tube until the reticle aligns vertically with the string, then lock it down. However, this means your reticle is now level, but possibly misaligned with the scope’s adjustment turrets. Any turret correction will still follow the original manufacturing error, potentially inducing the same cant-related issue you just tried to correct. The likely hood is low, but you can perform tall target test while on the range to confirm.
Focusing your Reticle
Now that your cant is adjusted, your rings are properly adjusted, focusing your reticle is the next crucial next step and one that you should do through the range of magnification. It is important to take your time, as you have to do it in stages. Your eye will naturally try to correct for any blurriness it sees, so you will need to constantly close and relax your eye, then make fine-tune adjustments once you are in the ballpark of where you think it might be.
- Mount your rifle and adjust the diopter so the reticle is out of focus and blurry.
- Be sure that your rifle is looking at a background with no detail; the blue sky is a good option. I also like to adjust the magnification at a mid-range.
- Now adjust the diopter to where you come into focus then just back out. This is a good way to familiarize yourself with the range of adjustments you will need.
- Close your eyes, letting them relax.
- While mounted to the gun with proper cheek weld, open your eyes and adjust the diopter again to where the reticle comes into focus.
- Close your eyes again and let them relax.
- Open them and again make any adjustments.
- Keep doing this again until the reticle is crisp as soon as you open your eyes.
- Next, do the same at max magnification.
Once you have completed your steps, you should be confident that your reticle is now in focus. Be sure to use the locking ring or other methods to secure your diopter if your scope has that as an option.
Bore Sighting
This can either be done at home or at the range. There’s no reason it can’t be performed at home, but be aware of unsettling your neighbors.
Set your rifle up on a sturdy surface without the bolt. You will need to setup the rifle so that you can look down the barrel at a target in the distance. This should be able to be done utilizing the take down pin for an AR-15 or for bolt guns, you will sometimes have to remove the adjustable comb.
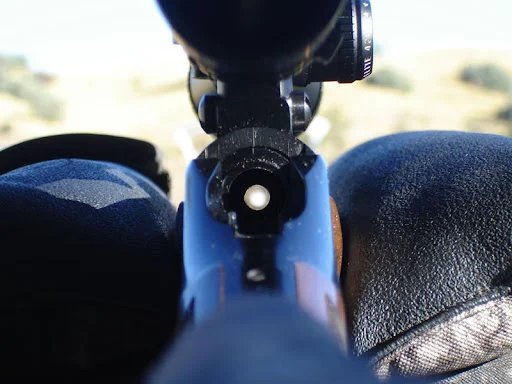
I suggest picking a high contrast object that is easy to pick out in the distance while looking through the barrel with the naked eye. Your goal is to position the rifle so that the object is centered within the barrel opening.
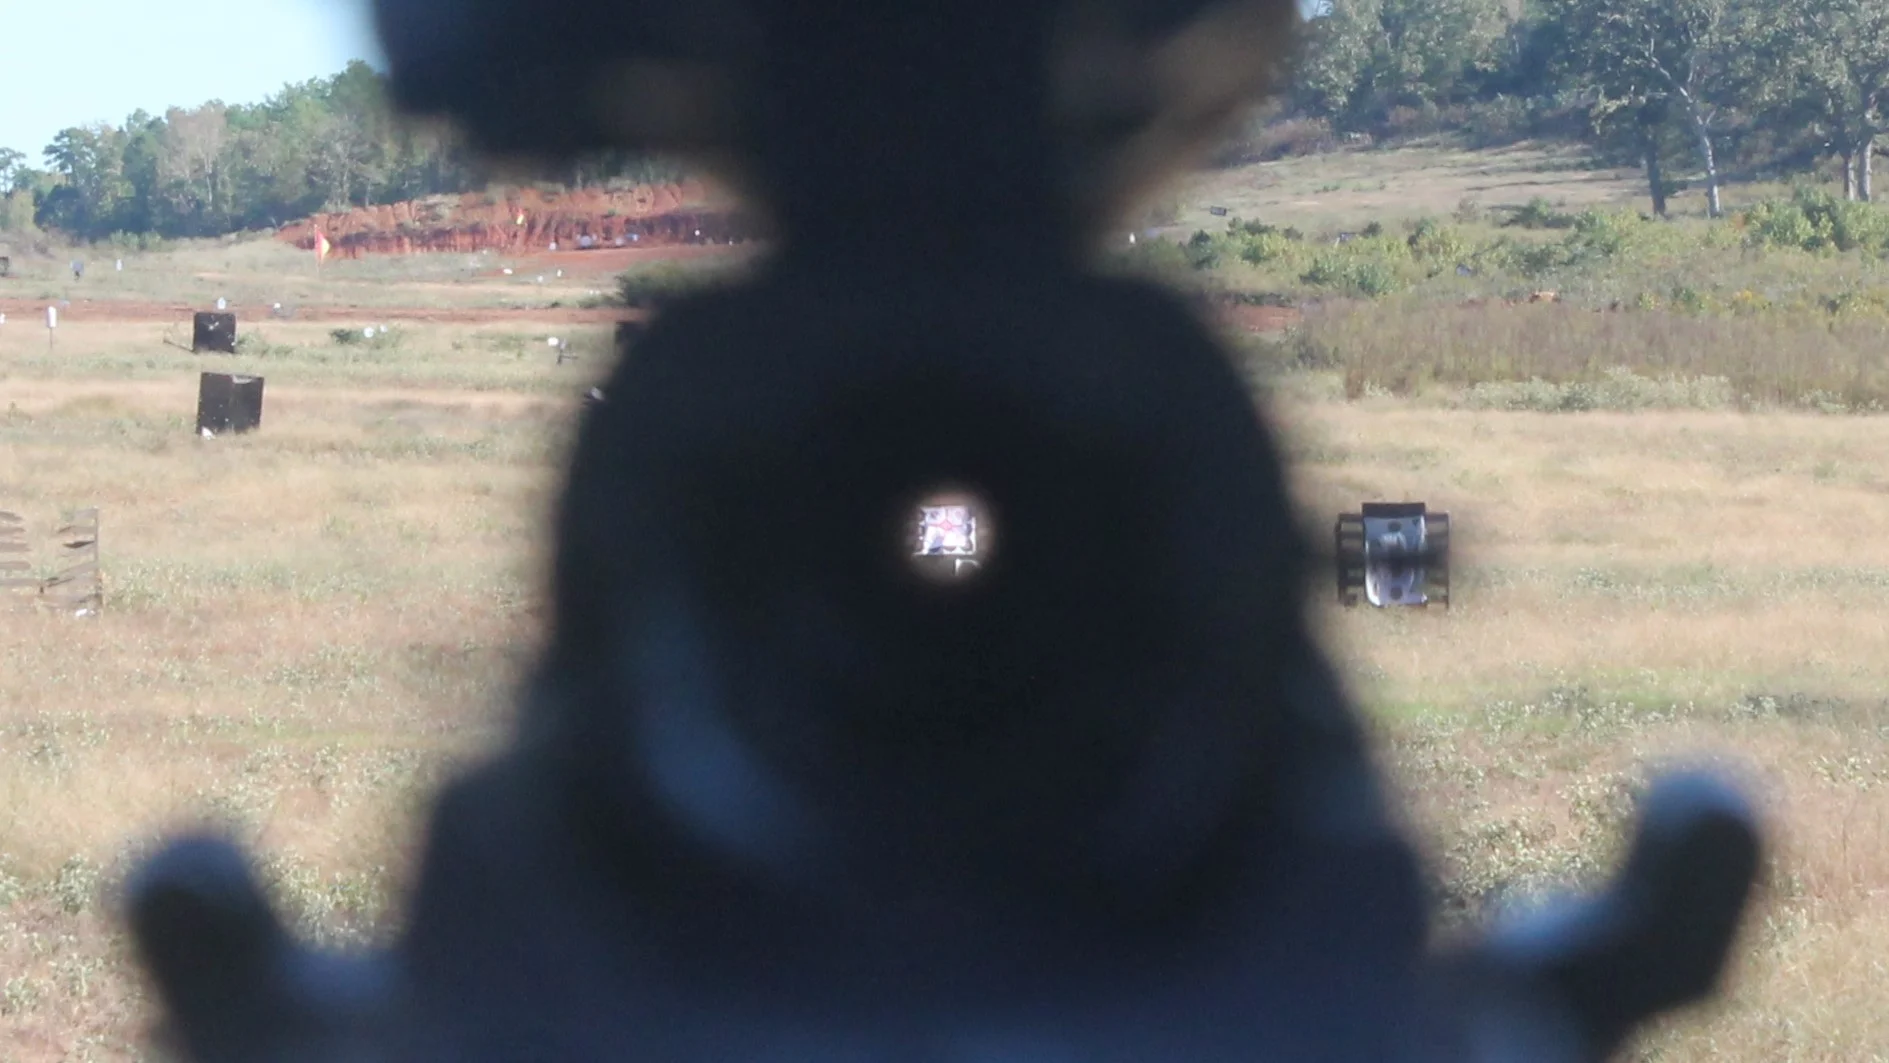
As you can see in the image below, the target is centered as best as possible in the center of the barrel. You need to make sure that you are directly behind the barrel and the rifling and image of the tub of the barrel is equal on all sides.
Finally, without moving the rifle, adjust the turrets of the scope so that the reticle is directly on the target you have centered in the barrel. Go back and forth to confirm you have not nudged the rifle.
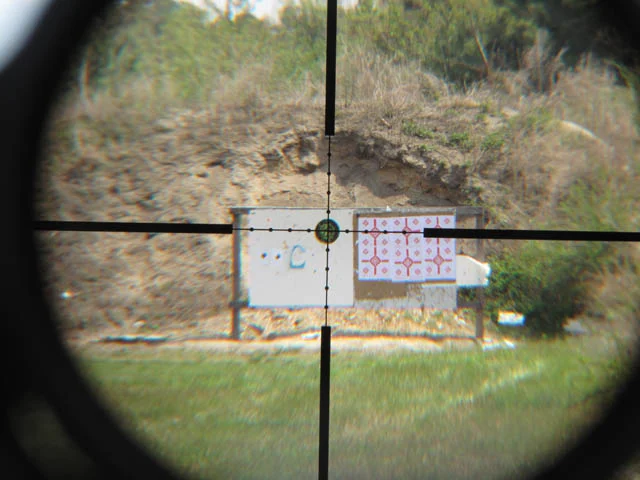
Doing this will assure that when you arrive at the range, your rifle, within a reasonable distance such as 100 yards, will at the very least be on paper. You will be able to shoot three shots to test grouping and confirm the actual zero and then make final adjustments so that your Point of Aim is equal to the Point of Impact.
Conclusion
Zeroing your rifle isn’t just about dialing in a few turret clicks at the range—it’s about building a system that works with you, not against you. By putting in the work ahead of time—fitting your rifle, understanding your positions, setting scope height, eye relief, and more—you’ll eliminate guesswork and maximize your time on the line. Whether you’re a first-timer or brushing up on fundamentals, the key is preparation. Come to the range with intention, shoot with purpose, and you’ll leave with confidence.

VERTX COF HEAVY RANGE BAG HTH/GL BLK
VERTX COF HEAVY RANGE BAG HTH/GL BLK